Policy Attestation lets you attach your organization’s policy documents to a training campaign and record which learners accepted each one, and when. Acceptance is captured per learner, per policy, with a timestamp, and reported alongside training activity — in campaign statistics, the user dossier, a dedicated CSV export and the public API — so you can answer an auditor without leaving OutThink.
Before you start
You can attach policies to a campaign when both of these are true:
- The campaign is a curriculum or instant campaign.
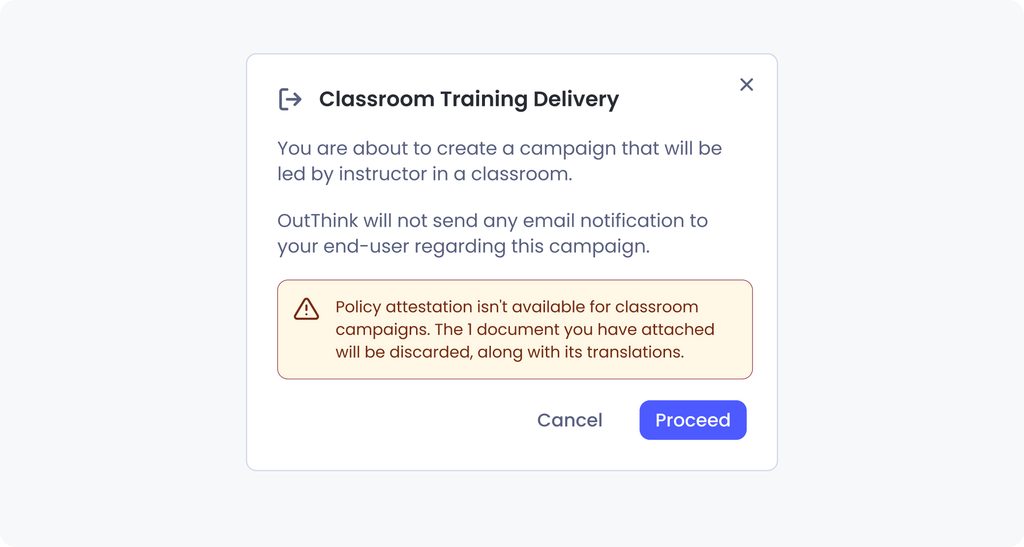
- The content delivery method is Headless or LMS. Policies are not available for Classroom delivery, because instructor-led training doesn’t take learners to the learner dashboard where policies are shown.
If you’ve already attached policies and then switch the delivery method to Classroom, you’ll be warned that the policies will be discarded. Confirm to switch and remove them, or cancel to keep both the delivery method and your policies as they were.
Attach policies to a campaign
- Create a curriculum or instant campaign and go to step 4 (Settings).
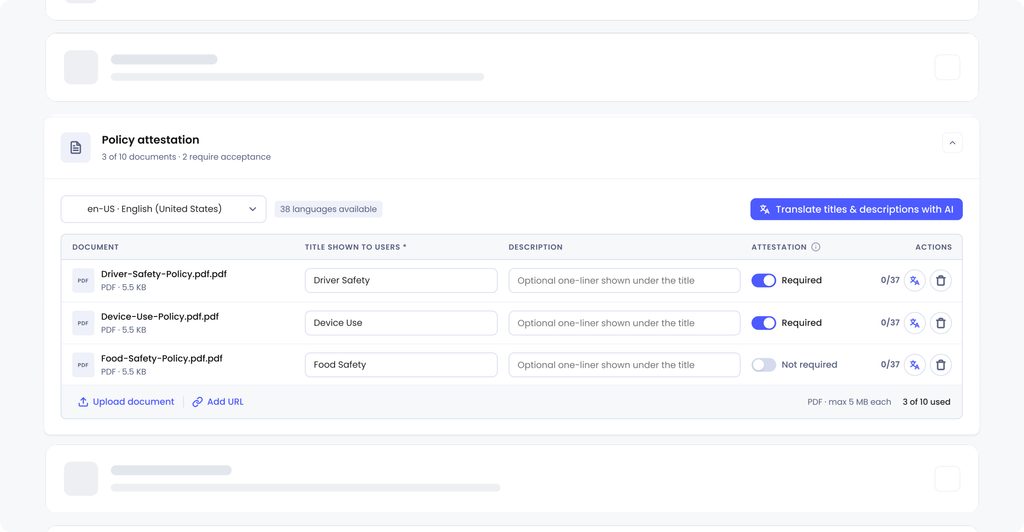
- Under Advanced settings, expand Policy attestation.
- Select Upload document to add a PDF, or Add URL to link to a policy hosted elsewhere, such as your intranet.
- Enter the Title shown to users and, optionally, a Description.
- In the Attestation column, choose Required or Not required. New policies are Required by default.
- Continue creating the campaign as usual.
Required and not required policies
- Required policies must be accepted before the learner can start or restart any training module in the campaign.
- Not required (optional) policies are shown to learners but never block their training.
File checks and limits
- Each uploaded PDF is checked to confirm it’s a genuine PDF. While the check runs, the file shows Checking file; once it passes, it shows Checked. You can’t create the campaign until every file has passed.
- There’s a limit on how many policies a campaign can have and on the size of each PDF. The section footer shows how many you’ve used and the size limit that applies to your organization.
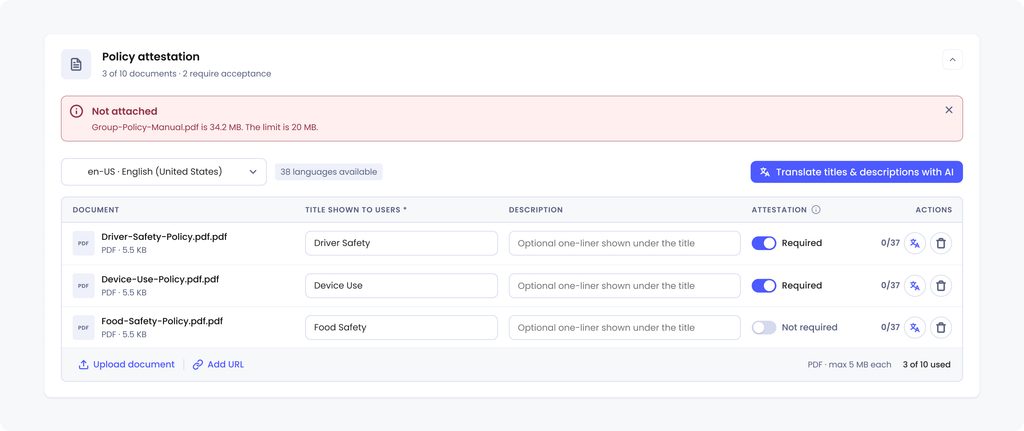
- If a file can’t be attached — for example, because it’s over the size limit — you’ll see a Not attached message explaining why.
Editing before and after creation
Until the campaign is created, you can edit a policy’s title, description and Required setting, or remove it. Once the campaign is created, its policies can’t be changed — not edited, replaced or removed, whether the campaign is scheduled, running or ended. This guarantees that every acceptance refers to exactly the document the learner saw.
Translate titles and descriptions
Learners see policy titles and descriptions in their own language where a translation exists. You write them in English, in your organization’s English locale, then translate them before creating the campaign.
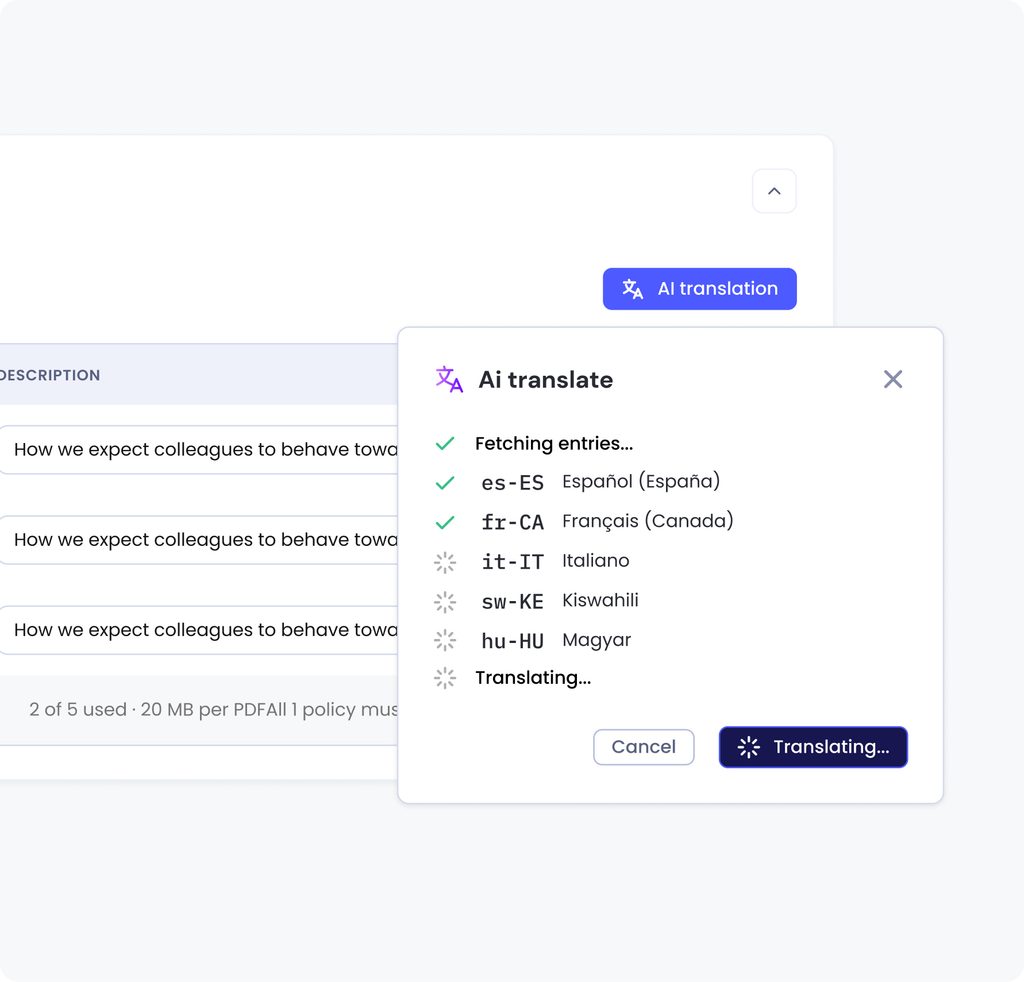
- In the Policy attestation section, select Translate titles & descriptions with AI.
- Choose the languages to translate into, then select Start translation. You can pick from the languages configured for your organization.
- To review or change a translation, select the translate action on a policy’s row. You can edit the title and description for any language. Editing a machine translation marks it as edited.
Good to know:
- Translation only runs when you start it. Nothing is translated automatically on upload.
- Running translation again for a language replaces that language’s existing title and description, including any manual edits.
- The policy document itself is never translated — only its title and description. If you need the policy in several languages, upload a single document containing all of them, or use a URL that points to a page where learners can choose their language.
- If a learner’s language has no translation, they see the English title and description.
- Translations can’t be changed once the campaign is created.
What learners see
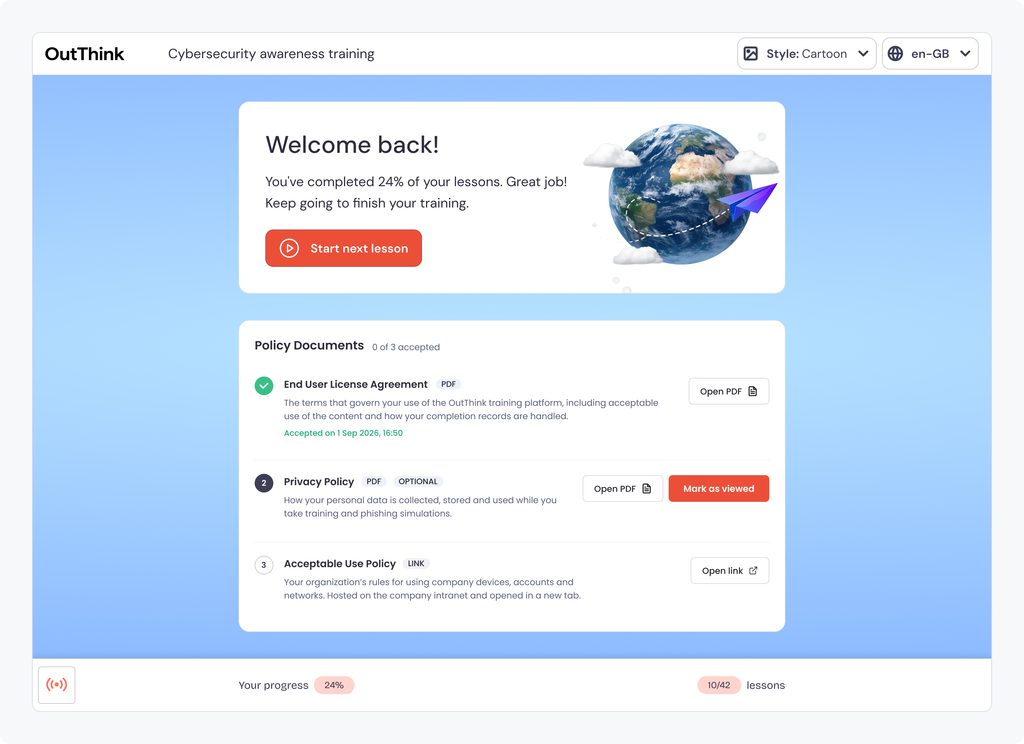
When a learner opens a campaign with policies, a Policy Documents section appears above their training modules, showing how many of the required policies they’ve accepted, for example “1 of 3 accepted”. If any policies are required, a welcome message explains that the modules unlock once they’re accepted, and the modules are shown as locked.
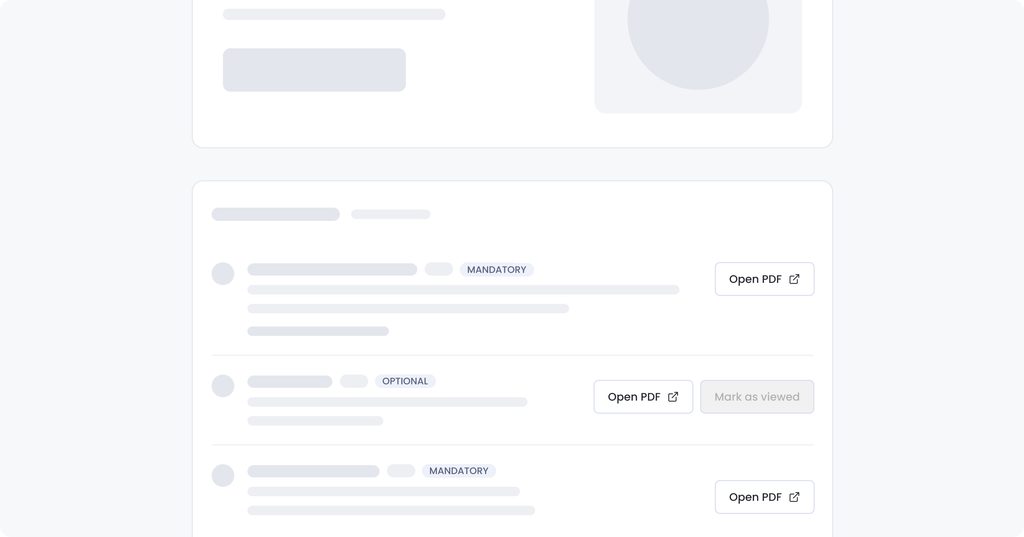
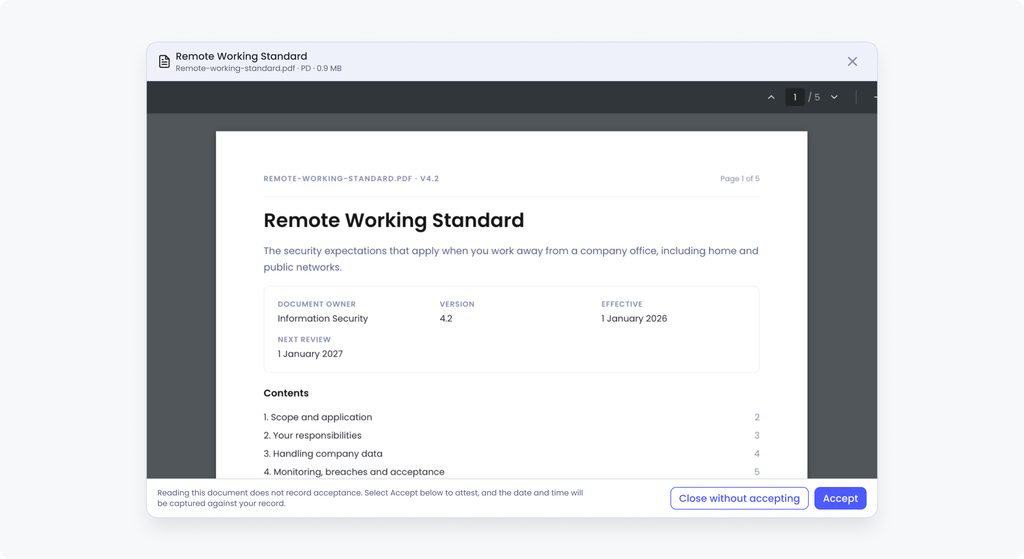
- PDF policies open in a window on the same page, with the Accept button inside it.
- URL policies open in a new tab. The Accept button next to the link becomes available once the learner has opened it.
- Opening a policy never counts as accepting it. The learner must select Accept.
- For optional policies, the button reads “Mark as viewed”.
- Once accepted, the button is replaced by a status showing the date and time, for example “Accepted on 1 Sep 2026, 16:50”, in the learner’s local time. Optional policies show “Viewed”.
- Learners can reopen and reread a policy at any time. They’re not asked to accept it again, and the original acceptance time is kept.
- When the last required policy is accepted, the modules unlock immediately, with no page reload.
Module access
Because modules can’t start until required policies are accepted, a learner who has completed a campaign has necessarily accepted all its required policies. Campaign completion itself is still calculated from modules only.
Track acceptance
Every place that shows a policy’s state uses the same wording:
| Policy type | After the learner acts | Before the learner acts |
|---|---|---|
| Required | Accepted | Not accepted |
| Not required (optional) | Viewed | Not viewed |
On screen, dates and times appear in your local time. In the CSV export and the public API, they’re in UTC.
Campaign statistics
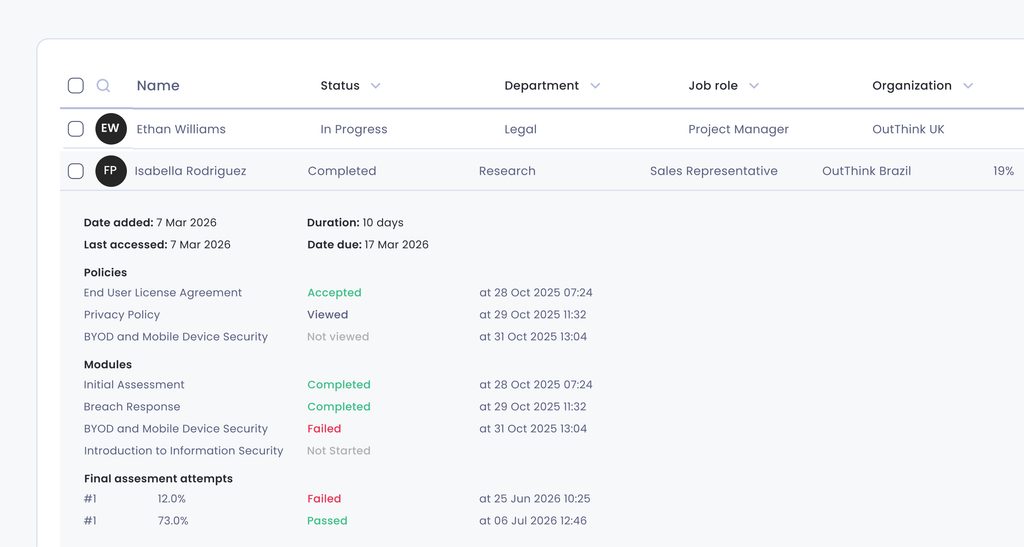
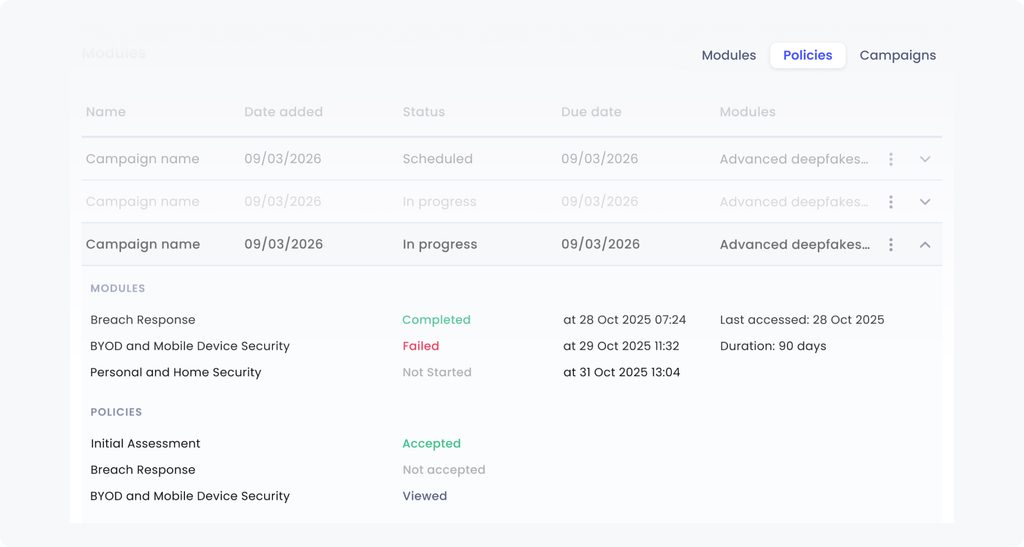
In the campaign’s user list, expand a learner’s row to see a Policies section above their modules. It lists every policy in the campaign with its state and, where the learner acted, the date and time. Policies the learner hasn’t acted on are still listed, so you can see who hasn’t accepted yet.
User dossier
In a learner’s dossier, go to the Training tab:
- The Policies view lists every policy across all their campaigns, newest first, with state and date. The same policy title can appear more than once — for example, in a campaign you clone each year — because each is a separate acceptance.
- In the Campaigns view, expand a campaign to see its policies alongside its modules.
Policies from ended, stopped, cancelled or archived campaigns still appear. Policies from deleted and test campaigns don’t.
Campaign settings
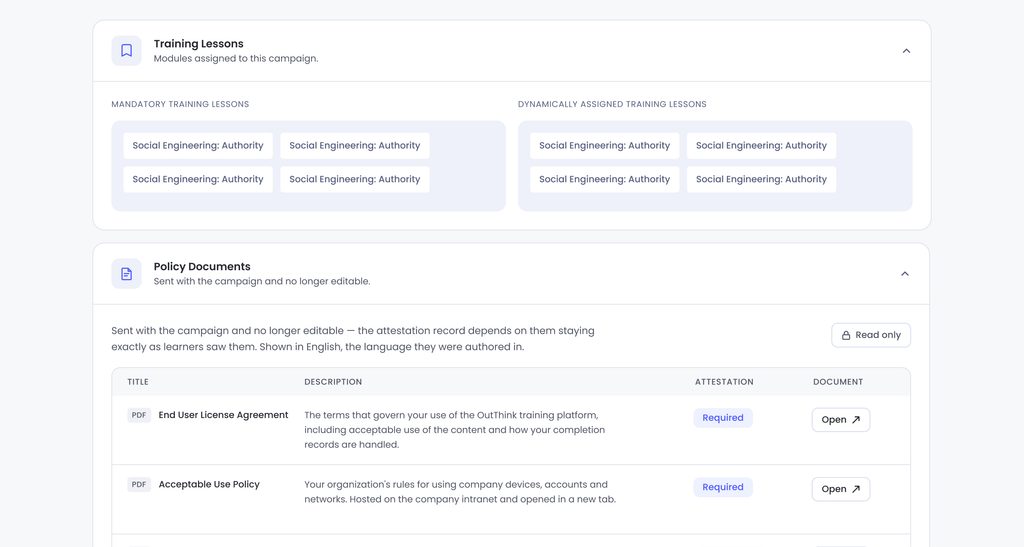
Open a created campaign’s settings to see its Policy Attestation card, read-only: each policy’s title, description, whether attestation is required, and an Open link to the document.
Policy attestation report
Campaigns with policies offer a Policy attestation report alongside the existing campaign reports: in the Reports menu of the campaign’s user list, and as the Policy Attestation Report button on the campaign dashboard. It has one row per learner per policy and is generated when you request it, so it’s always up to date. It includes the same learners as the Module allocation & completion report, using the same active-learner setting and filters.
| Column | Content |
|---|---|
| Name, Date Enrolled, Organization, Job Title, Email, Source Id, Business Unit, Department, Manager, Country, User Status, LMS Identifier | Learner details |
| Policy Format | PDF or URL |
| Policy Source | The uploaded file’s name, or the URL |
| Policy Title, Policy Description | Always in English, regardless of the language the learner saw |
| Policy Required | Whether acceptance was required |
| Status | Accepted / NotAccepted for required policies; Viewed / NotViewed for optional ones |
| Attestation Date | Date and time in UTC |
- Empty values are shown as
-, as in the other campaign reports.
Cloning a campaign
When you clone a campaign, its policies come with it: each document, title, description, translations and Required setting. The clone starts with no acceptances. If the original campaign is later ended or removed, the clone’s policies keep working.
If the clone has more policies than your current limit allows, all of them are carried over, but you’ll need to remove some before you can create the campaign. Switching the clone to Classroom delivery removes its policies, after the same warning as for a new campaign.
FAQ
Does opening a policy count as accepting it?
No. The learner must select Accept. Opening a PDF or a link never records acceptance on its own.
Can I add a policy to a campaign that’s already running?
No. Policies are attached during campaign creation and can’t be changed afterwards. Create a new campaign, or clone the existing one and attach the new policy there.
Why can’t I add policies to my campaign?
Policies are only available for curriculum and instant campaigns using Headless or LMS delivery.
Will a learner have to accept the same policy again when they reopen it?
No. They can reread it, but their original acceptance and its time stay as they are.
Does an optional policy affect completion?
No. Optional policies never block modules or affect completion.
Why are the times in my export different from what I see on screen?
Screens show your local time; the CSV export and the API use UTC.