OutThink provides three primary methods to group users:
- Upload a Local File: Group users by uploading a CSV file containing a specific list of users.
- Use Learner Attributes: Group users based on shared attributes, such as country, department, organization, or smart tags
- Leverage Platform Dashboards and Statistics: Group users using insights and data from platform dashboards and performance statistics.
This article outlines the steps and best practices for maximizing the use of groups to streamline learner management and enhance risk mitigation.
The platform, fundamentally supports 2 types of groups. Static groups and dynamic groups.
Static groups
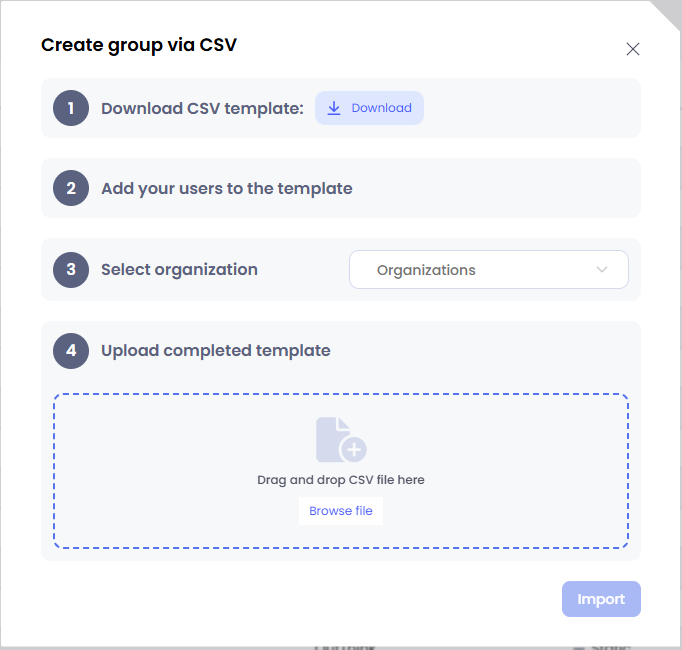
Admins can easily create static groups by uploading a CSV file to the platform. These groups can be manually modified by adding or removing users, allowing for seamless management. They can also be leveraged to segment campaigns, filter campaign dashboards, and efficiently organize groups of users.

- From within the Groups menu, select “Create group” > Static
- Download the template from the modal
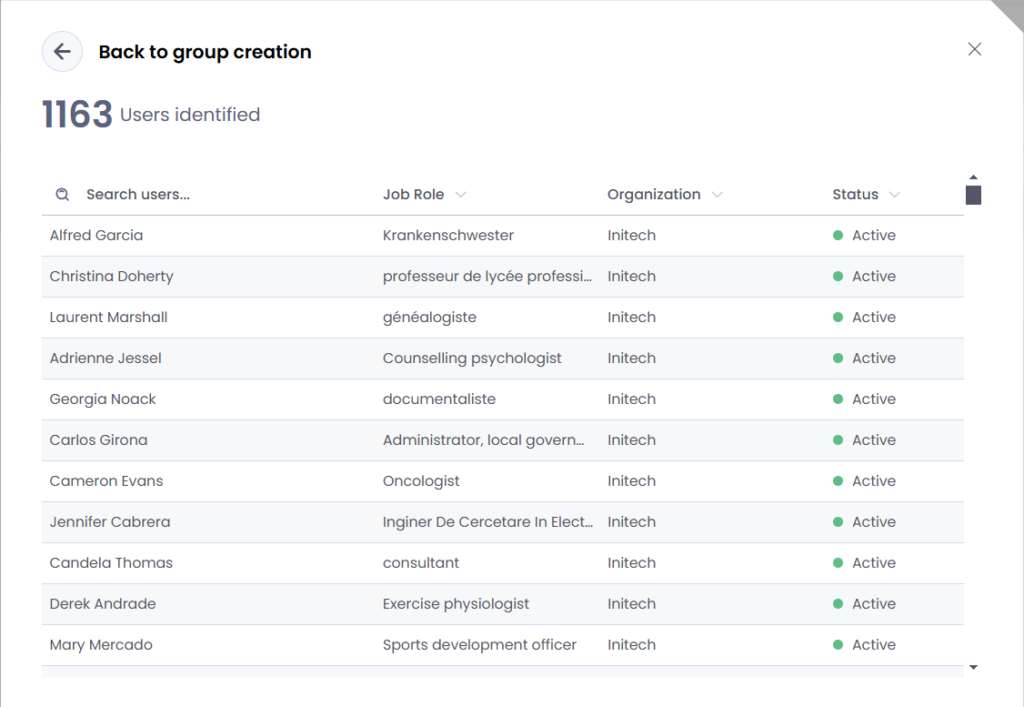
- Choose the organization where you want to create the group. Note that groups can only include users within the same organization. Any users who do not exist on the platform or belong to different organizations will be rejected during verification.

Dynamic groups
Admins can easily create dynamic groups by defining a set of rules that automatically add or remove users based on specific criteria. These groups are automatically updated, ensuring seamless management without manual adjustments. They can be used to segment campaigns, filter campaign dashboards, and efficiently organize groups of users based on real-time data.

- From within the Groups menu, select “Create group” > Dynamic
- Choose the dynamic rule to set the conditions for the group
- Inspect the users inside the segmentation
- Manage the dynamic rule by manually adding or removing users


Groups details

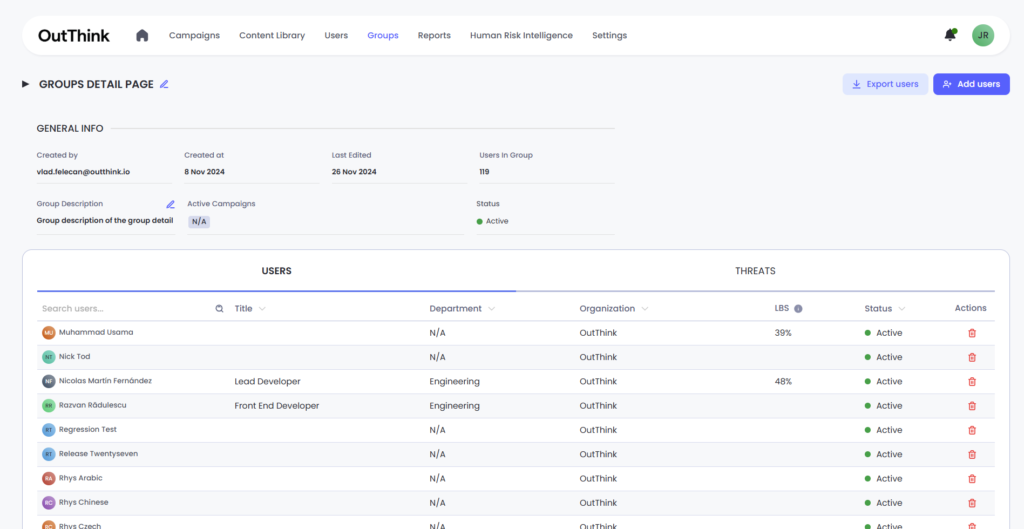
Inside the groups details, we can see the user list inside the group. You can see the user name, title, department, organization, status and LBS (Likelihood to behave securely).
What is likelihood to behave securely?
The Likelihood to Behave Securely (L2BS) is a simple, intuitive score that provides a high-level summary of how securely individuals are likely to behave based on their training performance. This score ranges from 1 to 100, where higher scores indicate stronger security behavior and lower scores suggest areas for improvement.
What Does L2BS Do?
LBS simplifies complex training data into a single, actionable number that reflects an individual’s readiness to handle cybersecurity challenges. By calculating this score at the user level, it allows for flexible aggregation to provide insights for teams, departments, or even entire business units.
For example:
- User Level: Understand a single learner’s security readiness.
- Group Level: Assess and compare the performance of teams or departments.
- Organization Level: Evaluate the overall cybersecurity posture across the business.
Why Is L2BS Important?
In a fast-moving digital world, managing cybersecurity risk is crucial. L2BS helps organizations:
- Quickly understand security preparedness.
- Identify teams or areas that need more support.
- Benchmark performance across different groups or time periods.
How Is L2BS Created?
L2BS is derived from multiple metrics that measure different aspects of training performance, such as knowledge, engagement, and confidence. These inputs are weighted based on their relative importance, ensuring the score provides a balanced and accurate representation of behavior